{tocify} $title={Table of Contents}
Introduction
We saw overview of Logic app standard in following post - Getting Started with Logic App Standard | Overview of Logic App Standard | Basics of Logic App Standard
How to setup local development environment using Visual studio code along with an example of creating first stateful workflow and testing it locally in following post - Developing Logic App Standard Workflow Using Visual Studio Code | Create Logic App Standard Workflow Using Visual Studio Code
In this post we will create another workflow in same project/logic app, where we will see how to use map in logic app standard workflow, test it locally.
Also how to deploy Logic app standard project in Azure logic app followed by verifying and testing the workflows.
Let's start with creation of the sample
Developing Logic app standard workflow using Visual studio code locally
In this sample, we will make use of a liquid map which accepts xml message and produces json message.
It is the same map which we covered in following post - Logic App - Xml to Json using Liquid Map | Append in Liquid Map
If new to liquid map, following post can help to get more insights - Getting started with Logic App : Liquid Map | Using Liquid template in Logic app
If you have observed, when we create project in Visual Studio code, there is a new folder called Artifacts.
Within this folder we have separate sub-folders-Maps and Schemas.
This are there to add maps and schemas which are used in project respectively.
And this is shared across all the workflows in same project/Logic app.
Add map file under Maps folder
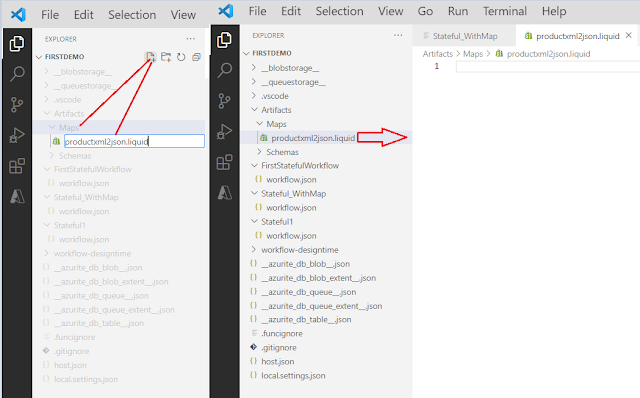
In the explorer, go to Project->Artifacts->Maps and click on Add file icon.
Provide a name and hit enter, you should see blank file opened in right pane.
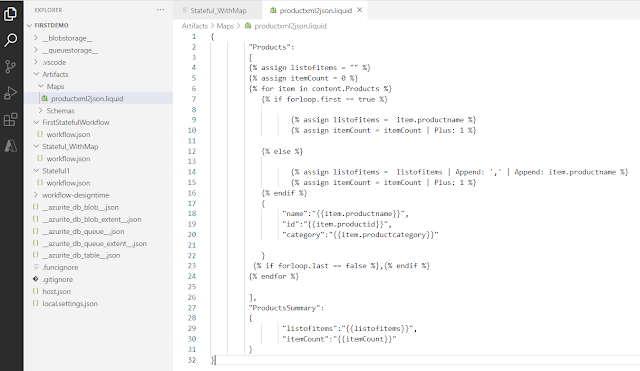
Add the code in map file and save it. We will be using it in the workflow.
Create the workflow
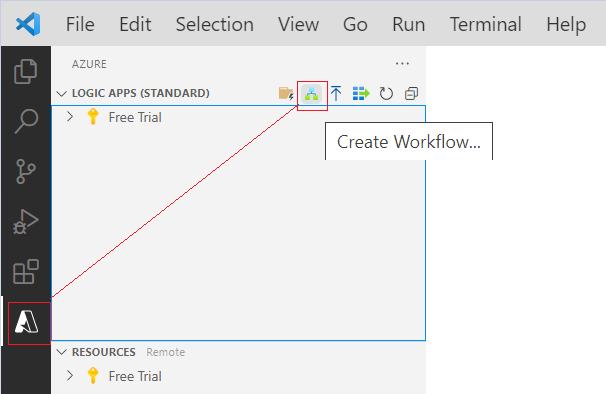
To create workflow we will click on logic app icon, this will add another workflow in the existing project/Logic app
Note:We are using same project used in last post - Developing Logic App Standard Workflow Using Visual Studio Code | Create Logic App Standard Workflow Using Visual Studio Code
Give the name to workflow (here it is Stateful_WithMap) and right click on workflow.json file and select Open in Designer
Add http trigger as the first step in workflow (When a HTTP request is received).
Select Logic App as source, here there is another option to choose Integration Account
Select map from list against Name, the map which we developed in step one.
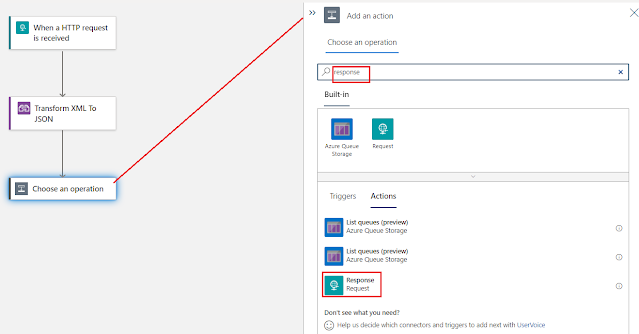
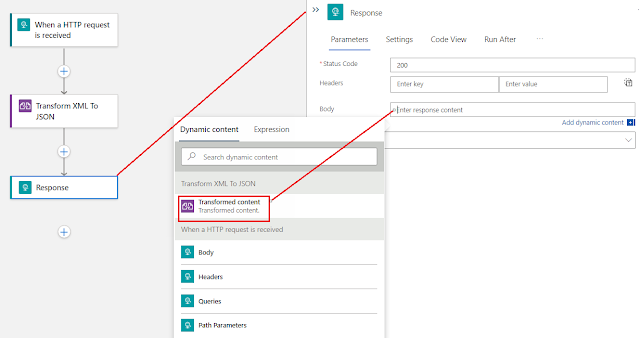
Add http response in workflow
Provide Transformed content as body of response.
Save the workflow and it's ready to test.
Testing Logic app workflow locally
We will make use of postman app to test the workflow locally, ngork service can be used to test it publicly.
Following is the Input:
<?xml version="1.0" encoding="UTF-8"?>
<Products>
<Product>
<productname>iPhone</productname>
<productid>EL123</productid>
<productcategory>Electronics</productcategory>
</Product>
<Product>
<productname>OnePlus</productname>
<productid>EL124</productid>
<productcategory>Electronics</productcategory>
</Product>
<Product>
<productname>Xioami</productname>
<productid>EL125</productid>
<productcategory>Electronics</productcategory>
</Product>
</Products>
Before we test, Azurite service needs to be started and the project has to be either Run or Debug
In postman app provide the above captured url, select Post as method, in Body provide the input and click on Send.
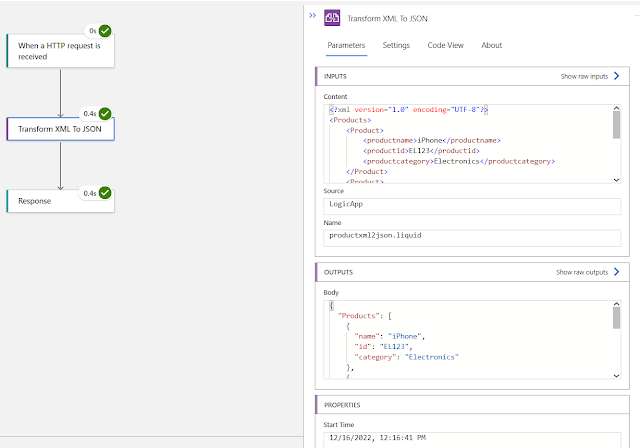
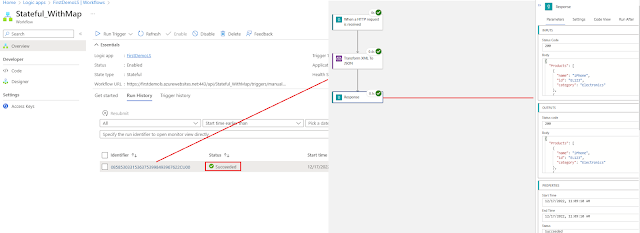
The call was successful with a response having JSON messages as per the map definition.
Following is the Output:
{
"Products": [
{
"name": "iPhone",
"id": "EL123",
"category": "Electronics"
},
{
"name": "OnePlus",
"id": "EL124",
"category": "Electronics"
},
{
"name": "Xioami",
"id": "EL125",
"category": "Electronics"
}
],
"ProductsSummary": {
"listofitems": "iPhone,OnePlus,Xioami",
"itemCount": "3"
}
}
Workflow run history on local dev env can be checked by visiting the
overview page
All right then all good on local env, let's deploy to azure now and test it.
Deploying Logic app standard workflow from Visual studio code locally to Azure Logic app
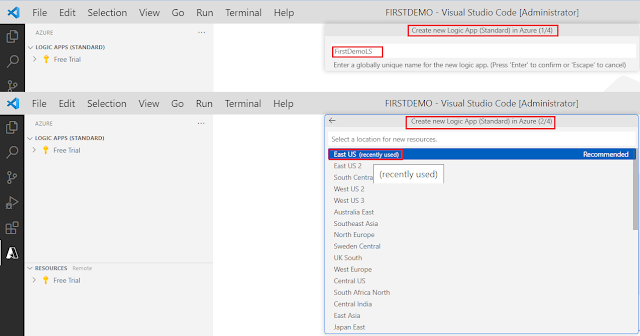
First step is to sign in to Azure if not already and select subscription(if
muliple)
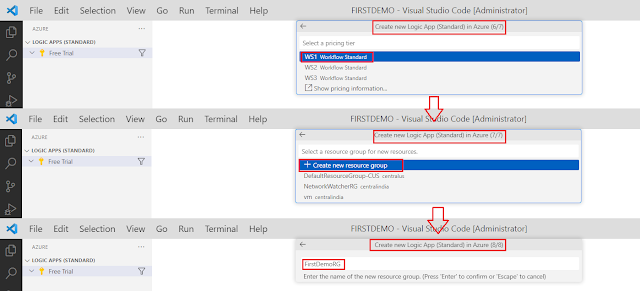
selected if you wish to go with App service env), create new app
service plan and provide a name.
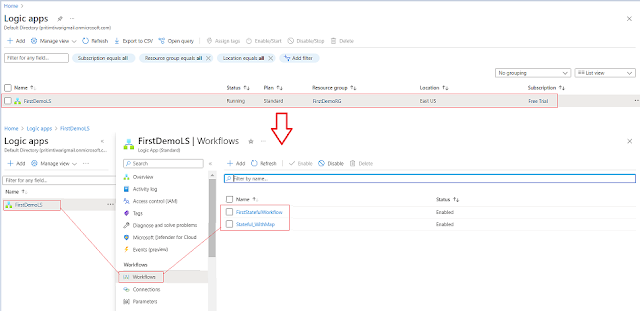
Deployment Successful. Let's verify, go to Azure portal --> Logic apps
workflow is visible under single logic app.
Testing Logic app workflow on Azure Portal
We can use any rest api client like Postman/Arc or we can test using
Azure portal itself(here we use this).
body and click on send and it was successful.
Summary
In this post we covered
- How to add map in visual studio code local env
- How to use the map in logic app standard workflow
- How to add multiple workflows in single project/Logic app
- How to test workflow locally
- How to deploy workflows developed locally to Azure Logic apps
